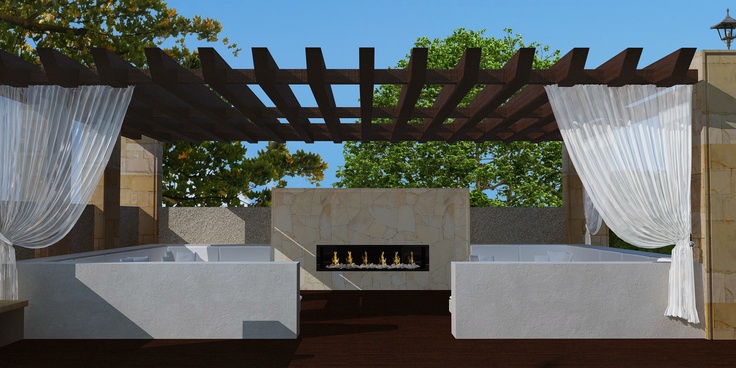
Having a pergola in your yard can make a great addition to any home, no matter the size.
Not only does it add to the aesthetics of your yard, it also provides a nice cool space to hang out.
If you are someone who likes to get their hands dirty, we will provide you a step by step process on how to set up your next pergola without paying someone to do so!
For our example we are going to be setting up a pergola that is 3.5 x 3 meters.
STEP 1: X MARKS THE SPOT
Use a spray can and measuring tape to mark where your posts are intended to go.
STEP 2: BUILDING A PROFILE
Building a profile for string lines is crucial for building a solid outline of where your pergola is going to be set up at. When building your profiles, you want to put them at least half a meter back from your outside corners.
You then want to erect two pieces of 4×1 into the ground that is just outside where you marked your corners with the spray can.
While doing this you want to make sure that these pieces of wood are levelled.
You then want to put two nails in the boards in line with the corner max, which then allows you to run your string lines.
In order to ensure that the area is exactly your desired measurements, you will want to make sure to measure the diagonal points.
STEP 3: DIGGING
Before digging and installing your posts you want to go back to your first spray can mark and measure out how much space your posts will be taking.
For this example, our post will be 100mm x 100mm with H5 treated timber.
Before digging, you want to take off your string lines so they don’t interfere with your digging. When creating your hole, you want to dig about 2 feet deep and 2 feet wide.
You then want to put up your string lines in the same positions prior to removing them.
In order for your post to sit off the ground you can add concrete blocks at the bottom of the hole that you created.
STEP 4: PUTTING IN POST
Align the post to the corner that was created by the string line for the best accuracy. Following insertion of the post, you want to make sure you brace the posts with supporting slabs of wood.
STEP 5: CONCRETE
After pouring in your concrete, you want to use a stick to mix the concrete to ensure there are no air bubbles within.
STEP 6:
Once you let your concrete sit for 24 hours, you can now remove string lines, profiles and braces.
STEP 7: MARK THE HEIGHT OF POST
Marking the height of your posts will give you a better indicator of where your bearers and top will be placed.
For this example, we will be making the pergola 2 meters high. On the 2 meter mark, insert a nail on all four points where you can place a large slab of wood along each side.
STEP 8:
Just like we used a leveller for our profiles, we want to level out the newly added slab of wood. Take your pencil and mark where the slab of wood made contact to the posts when it was resting on the nail.
STEP 9: CUT POST TO CORRECT HEIGHT
Cut off the excess posts that surpass your rebate.
STEP 10: CUT OUT REBATE
STEP 11: MEASURE AND CUT BEARERS
Due to the fact that our pergola is 3.5 meters long, for this example we are going to hang the bearers 300mm past the side of the posts. That means our bearers need to be 4.1m long.
We then want to shape our bearers by coming in 300mm and down 35 mm starting from the end of your slab of wood.
STEP 12: MARK WHERE RAFTERS WILL SIT
STEP 13: CUT WHERE THE BATTENS WILL SIT
The battens will sit on top of the rafters, so we want to make sure to mark and cut them precisely. The pergola is 3.5 meters wide, so we are going to make battens 3.6 meters long for this example. This will include a 50 mm overhang on either side. A quick way to make sure that the battens are laid properly on the rafters is to mark them all at the same time.
The separation between each batten depends on your preference.
Now you can place your bearers in your rebates and clamp them so you can drill your holes for the bolts.
STEP 14: LAYING THE RAFTERS
Because we already marked where the rafters will go, laying them and bolting them should be easy!
STEP 15: LAYING BATTENS
Lay your battens on top of the rafters.
TIP: Pre-drill the holes at the end of each batten to reduce splitting.
You did it! You are now looking at your newly installed pergola, done by you!
We hope this blog post gives you the courage to take on your first pergola project. Should you have any questions feel free to contact us!